
Star trails divide into two camps: those who chase the single, monumental bulb exposure, and those who assemble their arcs from dozens of shorter frames. The distinction is not merely stylistic. It shapes the noise profile of the final image, the smoothness of every trail, and how much control remains once the sequence leaves the field. This article makes the case for stacking, then walks through the framing, timing, capture, and blending decisions that turn a folder of RAW files into a smooth rotation of the northern sky.
Challenging the Single-Exposure Myth
The exposure plan begins by separating two goals that photographers routinely confuse: collecting enough sky time to draw long trails, and keeping each file clean enough to blend. For years the single bulb exposure was treated as the purist's route. Open the shutter, wait an hour, and let the sky inscribe itself in one continuous frame.
The problem is thermal. Sensors accumulate heat across a long exposure, and that heat surfaces as amplifier glow and colored hot pixels precisely in the shadow regions where a night sky lives. A single thirty-minute frame carries all of that noise in one irreversible file.
Stacking reverses the logic. Shorter frames, each clean, are combined afterward so that the trails accumulate while the noise does not. For many night-sky trail sequences, individual frames commonly land in the 15–30 second range before stacking, depending on focal length, aperture, ISO, and sky brightness. The result preserves fine detail in the foreground and holds the color of the sky where a marathon exposure would have muddied it.
Critical Insight: Gaps in a stacked trail almost never come from the stacking method itself. Visible breaks usually trace back to intervalometer lag, long-exposure noise reduction writing delays, or a shutter interval set longer than the exposure it follows.
Understood that way, the single-versus-stacked debate is less about aesthetics and more about which failure you are willing to accept: baked-in sensor noise, or timing artifacts you can plan around.
Locating Polaris for Consistent Rotation
The framing decision arrives before tripod height and foreground are finalized. A circular trail composition depends entirely on where the north celestial pole falls within the frame, and that pole is marked, conveniently, by a moderately bright star.
Reading the Sky for the Pole
The Big Dipper serves as the first pointer. The two outer stars of its bowl lead the eye directly toward Polaris. When the Dipper sits low or hidden below a ridge, Cassiopeia—its distinctive W hanging on the opposite side of the pole—can confirm the same direction. Polaris sits less than one degree from the north celestial pole, close enough for circular star-trail composition without any specialized tracking gear.
Center Polaris and the trails will curl into concentric rings around it. Push it toward a corner and the arcs sweep across the frame in graceful partial curves. Both are valid; the choice simply needs to be deliberate rather than accidental.
A short test exposure of 10–20 seconds at high ISO confirms whether Polaris lands where you intended before you commit to a full sequence of hundreds of frames. That single verification frame saves an hour of misdirected capture.
Risk Factor: Polaris-based rotation planning is a northern-hemisphere method. Southern-hemisphere compositions have no bright pole star and require locating the south celestial pole through constellation geometry—typically by projecting from the Southern Cross—before the framing can be trusted.
Intervalometer Settings and the 500 Rule
The intervalometer gets programmed only after the lens choice is locked, because focal length dictates how long a single frame can run before stars drift from points into short streaks. The 500 rule provides that starting boundary.
The calculation is direct: maximum exposure in seconds equals 500 divided by the focal length, with crop factor folded in for non-full-frame bodies. A 20 mm lens on full frame gives a starting maximum of 25 seconds. Mount that same lens on a 1.5x crop body and the starting point drops closer to 16 seconds.
That figure is a ceiling for pinpoint stars, not a target. For trail work the goal is continuity, so the interval between frames matters as much as the frames themselves.
Closing the Gap Between Frames
For unbroken trails, the interval should equal the exposure duration, exceeding it only by the camera's required write-and-reset time—often 0–1 second when the card keeps pace. Any longer, and each gap prints itself as a dotted break in every trail across the sky.
A practical starting exposure set is f/2.8–f/4, ISO 800–3200, and 15–30 seconds, adjusted after reading the histogram and checking for highlight clipping. The three variables trade against one another. Widen the aperture and you can drop ISO for cleaner shadows; a brighter sky forces the opposite compromise.
Recommendation: A bright moon, urban skyglow, or a snow-covered foreground may demand shorter exposures or lower ISO even when the 500 rule permits a longer shutter. Trust the histogram over the formula whenever they disagree.
Executing the Capture Sequence
Treat the capture as a controlled repeatability problem. Every frame must match its neighbors so tightly that the software cannot tell where one ends and the next begins. The camera rides a rigid tripod, image stabilization switched off once it is locked down, and focus set manually so autofocus cannot hunt in the dark between frames.
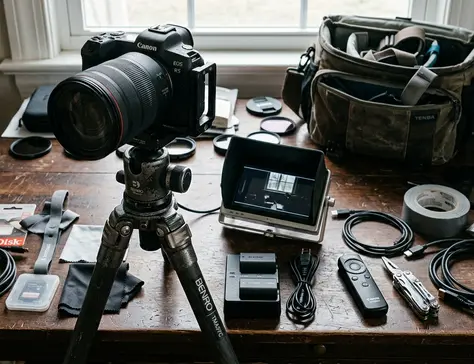
A 45–120 minute sequence is a useful field target: long enough for visible arcs, short enough to avoid an all-night vigil. To make the arithmetic concrete, at 25 seconds per frame with a 1-second reset gap, a 90-minute session produces roughly 207 RAW frames.
- Shoot RAW with a fixed white balance so color temperature stays constant across the set.
- Lock manual exposure and manual focus; nothing should shift mid-sequence.
- Power the camera from a fully charged battery or an external source, since cold air drains cells faster than the meter suggests.
- Leave card capacity for hundreds of RAW files, the exact requirement depending on resolution and compression.
Risk Factor: Leaving long-exposure noise reduction enabled inserts one dark-frame pause after every exposure. Those evenly spaced pauses print as regular breaks in the trails that no blend mode fully hides. Disable it before the sequence begins.
Once the intervalometer is running, the work becomes monitoring rather than shooting. Check the first few frames for vibration, then let the sequence build while you watch battery level and remaining storage.
Blending Frames for Gapless Trails
The blend is assembled by importing the full sequence, culling the obvious problem frames, and stacking the sky with a lightening-style blend so each star position adds to the trail rather than averaging away. Lighten mode keeps the brightest pixel at every location—which is exactly what a moving star contributes as it crosses the frame.
Culling Before Stacking
Remove frames spoiled by headlamp sweeps, aircraft strobes, tripod bumps, or a bank of cloud drifting through. A single ruined frame injected into a lighten stack can leave a bright scar across the whole composition, so this triage happens first, before any blending decision.
If small interval gaps produced faintly dotted trails, gap-filling or comet-style blending reduces the breaks. Those tools soften short interruptions; they cannot rebuild long missing intervals, which is why the timing discipline of the capture stage carries so much weight.
Risk Factor: Star-alignment software built for pinpoint deep-sky astrophotography will register every frame to the same star positions—erasing the very rotation the sequence was captured to record. Stacking for trails aligns to the ground, not the sky.
When the foreground needs different treatment than the sky, keep a separate frame for the land—often one exposed for brightness, color temperature, or noise handling that the sky frames cannot supply. Mask it in beneath the stacked trails and refine the seam with curves until the horizon reads naturally.
A Worked Example You Can Copy
Suppose you carry a 20 mm lens on a full-frame body and want a 90-minute rotation around Polaris. Point the Big Dipper's bowl toward the North Star, then place Polaris a third of the way in from the left edge for sweeping partial arcs. Fire a 15-second test frame at ISO 6400 to confirm the composition, then set working values: f/2.8, ISO 1600, 25-second exposures.
Program the intervalometer for a 26-second cycle—25 seconds open, one second to write and reset—and switch off both stabilization and long-exposure noise reduction. Ninety minutes yields about 207 RAW frames. Before the sky sequence ends, add one dedicated foreground frame at ISO 400 and a 4-minute exposure for a clean, low-noise base.
In post, import all 207 sky frames, delete the three spoiled by a passing jet, and stack the remainder in lighten mode. Layer the low-ISO foreground beneath the trails, mask it to the horizon line, and lift the sky's shadow curve just enough to separate the arcs from the dark background. The finished frame shows unbroken concentric trails over a foreground that never touched the sensor's accumulated heat—the whole argument for stacking, resolved in a single image.












Reader Comments
The conversation starts with you.
Your Comment