A day-to-night time-lapse is not a long sunset recording. It is an exposure-control problem that happens to become cinematic when the math, the sky, and the subject agree.
The useful way to approach the sequence is to start with light itself. During the transition from daylight through blue hour and into early night, the camera stops seeing a bright scene with manageable shadows and starts seeing a low-light scene with isolated highlights. That change rarely follows the clock in a neat line.
In this Article
- Why Day-to-Night Transitions Defy Standard Techniques
- Core Equipment for Reliable Exposure Control
- Executing Controlled Exposure Ramping
- Selecting Intervals That Preserve Motion Continuity
- Refining the Sequence in Post-Production
- Recognizing Practical Boundaries of the Technique
Why Day-to-Night Transitions Defy Standard Techniques
The sky, not the clock, sets the exposure problem
I plan this transition around the sky rather than the scheduled sunset time. The first useful decision is to identify when the scene stops behaving like a daylight exposure problem and starts behaving like a low-light exposure problem.
Civil twilight covers the sun’s position from the horizon to 6 degrees below it, and that span often contains the most aggressive exposure change. The foreground may still hold shape, but the sky can fall rapidly enough that a fixed manual exposure turns into a silhouette study. Auto exposure reacts, but it usually reacts in visible steps, especially when bright clouds, traffic, or water reflections enter the frame.
Each full stop of lost light demands a physical trade: double the shutter time, open the aperture one stop, or double ISO. In time-lapse, aperture should stay fixed because changing it can shift depth of field and reveal iris-position differences as flicker. That leaves shutter speed and ISO as the practical ramping tools.
Critical Insight: A clean day-to-night sequence depends less on a dramatic sunset and more on controlling the rate of exposure change between adjacent frames.
A scouting pass removes guesswork
A practical scouting pass is simple: shoot reference frames every 5 minutes from 30 minutes before sunset until 30 minutes after sunset. Then inspect two points. First, note when bright sky detail stops clipping. Then note when the foreground becomes unrecoverable for the story you want to tell.
One field failure illustrates the problem well. A sunset over water can meter cleanly for the sky while specular reflections from waves create frame-to-frame brightness spikes that survive ordinary deflickering. The histogram looks acceptable, yet the finished clip pulses because the subject itself is unstable.
That is why the transition needs a plan before the intervalometer starts.
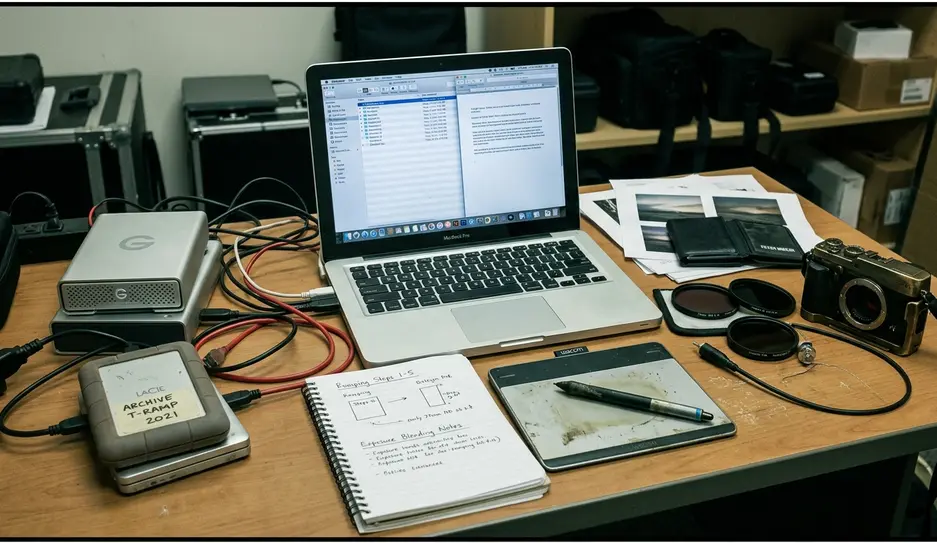
Core Equipment for Reliable Exposure Control
Start with the final exposure, not the first frame
The common question is, “What gear matters most?” The better version is, “What gear can still operate when the night frame requires a long exposure?” Gear selection starts with the longest required exposure, not the bright opening frame.
Use an intervalometer or camera controller that can change shutter duration in increments fine enough to avoid visible jumps between adjacent frames. If the night portion needs multi-second exposures, the controller must handle bulb ramping or give you a practical way to adjust exposure manually without shaking the camera. A basic interval timer can start a sequence; it cannot necessarily shepherd it through twilight.
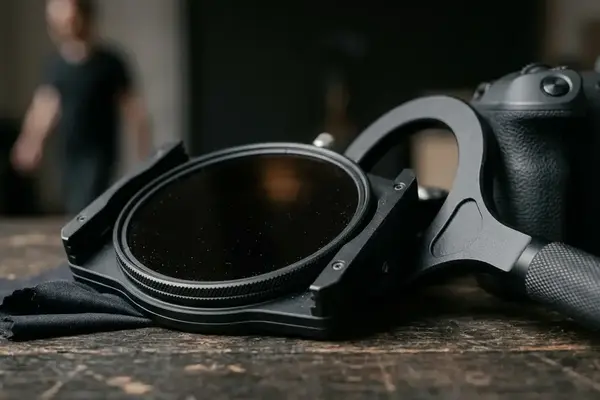
A 3-stop or 6-stop neutral density filter can help the first daylight frames enter a shutter range that leaves room for later ramping. Without ND filtration, the camera may begin near its fastest useful shutter speed, which gives the ramp very little headroom. With the right filter, the daylight exposure starts slower, and the transition has more room to breathe.
Tripod stability is an exposure tool
A sturdy tripod and head rated for long sessions matter because composition drift reads as a defect. A lightweight travel tripod that seems stable in daylight can show subtle drift after a cold temperature drop tightens cables, shifts the head, or changes how the camera strap catches wind. Long exposure work magnifies those small motions.
For a multi-hour sunset-to-stars sequence, plan power and media for the full capture window plus setup and retake time. A common field plan is 45–60 minutes of setup followed by 2–4 hours of active capture, based on community experience. That buffer is not indulgent; it covers leveling, focus confirmation, test frames, filter handling, and the occasional decision to start again.
Field Checklist for a Day-to-Night Time-Lapse
- Scout the composition at daylight and again near twilight if possible.
- Lock focus before the first frame and tape the focus ring if the lens is easily disturbed.
- Set aperture manually and keep it unchanged for the full sequence.
- Confirm that the interval exceeds shutter time, file write time, and controller lag.
- Carry power and media for setup, the full run, and one retake attempt.
- Watch for wind, strap movement, and cable tension before the light becomes critical.
Recommendation: Build the kit around the final night exposure. If the controller, battery, card, and tripod can handle that frame, the daylight portion usually becomes the easier half.
Executing Controlled Exposure Ramping
Build the ramp from endpoints
A beginner often thinks of ramping as constant adjustment. A steadier method starts with endpoints. Establish the daylight exposure that protects sky detail, then establish the final night exposure that gives acceptable shadow, skyline, or star brightness.
Once those endpoints exist, the ramp becomes a path between them. Change shutter speed first. Raise ISO only after shutter time threatens the interval or the star-motion limit. Keep aperture fixed from the first frame to the last.
Manual ramping gives direct control, but it demands discipline. Automated bulb ramping reduces handling and can produce smoother exposure transitions when the controller offers fine enough steps. The choice is less philosophical than mechanical: use the method that changes exposure without jolting the camera or creating visible frame-to-frame jumps.
Use test frames to locate the steep section
The steepest twilight portion deserves the most attention. A useful test sequence uses 12–20 frames per exposure change during that portion. Fewer frames can make the ramp look stepped when played at 24 or 30 frames per second.
If the final night frame requires 10 seconds, the shooting interval must be longer than 10 seconds plus card write time and a safety margin. This is where exposure theory meets camera behavior. A camera that writes slowly, buffers raw files unpredictably, or hesitates between bulb commands can break an otherwise careful plan.
Do not let aperture solve a ramping problem
Opening the aperture during the sequence may seem tempting because it buys light quickly. It also changes depth of field and can introduce small mechanical variations from frame to frame. In a still photograph, those differences may pass unnoticed; in motion, they become structure.
Keep the optical geometry stable. Let time and sensitivity carry the exposure shift.
Selecting Intervals That Preserve Motion Continuity
Match the interval to the fastest visible motion
Interval choice starts with motion, not with convenience. Moving clouds, traffic, surf, and walking figures need tighter spacing than a static skyline. For fast clouds, crowds, or waves, intervals in the 2–5 second range preserve smoother motion. For slower skyline transitions, 8–15 seconds can look natural.
A mountain scene may need longer intervals because shadows advance slowly across ridges. A coastal scene with wind-driven clouds may need shorter intervals even if both are shot at the same sunset time. The clock matches; the motion does not.
The exposure must fit inside the interval
As darkness arrives, shutter time stretches. The interval must exceed shutter time, file write time, and controller lag. For example, a 13-second exposure usually calls for an interval longer than 15 seconds in the field.
This constraint creates a practical ceiling. If the subject needs a 3-second interval to move smoothly but the night exposure needs 13 seconds, the sequence has a conflict. You can shorten the exposure by raising ISO, accept rougher motion, change the composition, or stop before the deepest night segment.
Stars impose their own limit
When the final segment includes stars, shutter duration cannot expand indefinitely. For stars on a full-frame camera, a 24 mm lens is commonly kept near 15–20 seconds to limit visible trailing. Longer focal lengths require shorter night exposures.
This is not only an astronomy issue. Star trailing changes the texture of the final frames, and the viewer reads that change as a shift in visual language. If the sequence begins with clean cloud motion and ends with smeared stars, the transition may feel less like time passing and more like technique becoming visible.
Refining the Sequence in Post-Production
Protect continuity before adding style
Post-production starts with restraint. Apply the same lens profile, white-balance strategy, and base contrast treatment to the entire sequence before making individual portions more dramatic. The first goal is not spectacle; it is continuity.
At 24 frames per second, a 10-second finished clip requires 240 still frames. At 30 frames per second, it requires 300 still frames. Those counts explain why small exposure steps matter: a tiny inconsistency repeated across hundreds of frames becomes motion.
Deflickering has limits
Deflickering software can smooth residual exposure steps, especially when the ramp was close but not perfectly even. It cannot always repair subject-based brightness changes. Headlights, breaking waves, fast clouds, and reflected sun patches may look like exposure flicker even when the camera behaved correctly.
Frame blending across 2–4 adjacent frames can soften abrupt twilight changes. It can also smear headlights, waves, or fast clouds. Use it as a local treatment, not as a blanket cure.
Grade at three anchor points
Color grading should be checked at three anchor points: bright daylight, mid-twilight, and the final night frame. A grade that flatters blue hour can contaminate daylight skin tones, city lights, or the dark sky. A grade designed for the night frame can make the early frames feel heavy.
This is where color science becomes practical rather than abstract. White balance, saturation, and contrast interact with sensor noise and highlight color as luminance falls. Nik Color Efex Pro or Nik Silver Efex Pro can be useful for selected still interpretations, but a full time-lapse sequence usually needs a more restrained global pass before any stylized treatment.
Recognizing Practical Boundaries of the Technique
Some scenes do not survive the light change
The hardest decision is whether the scene is stable enough to deserve the full capture. A day-to-night session can easily run from 60–90 minutes before sunset to 90–150 minutes after sunset when the goal includes twilight and early night sky. That is a large commitment for a subject that may lose its shape after dark.
Here is the catch within sunset-to-early-night continuity: the technique depends on a scene whose visual story survives the entire light change. If the subject becomes unreadable after dark, perfect exposure ramping will not make the sequence compelling.
Weather can create a false cut
Rapid fog, marine layer, or low cloud can change contrast and color temperature in a few minutes. The resulting discontinuity often looks like a cut rather than a transition. The exposure may remain smooth, yet the atmosphere has rewritten the scene.
Before starting, check the horizon for incoming haze, assess wind on the tripod, and decide whether the foreground will still matter once ambient light disappears. This is not pessimism. It is a way to protect the hours that follow.
Heat, power, and storage set the outer edge
Long-exposure sequences in warm conditions increase sensor heat and can raise visible noise in the final night frames, especially during repeated exposures longer than 10 seconds. Batteries drain faster as exposure times lengthen and temperatures shift. Cards fill faster than expected when raw capture runs for hours.
Risk Factor: Do not begin a full day-to-night sequence just because the exposure plan works on paper. Confirm that the subject, weather, tripod, battery, card capacity, and sensor behavior can support the complete run.
Flawless day-to-night time-lapse mastery comes from respecting limits, not ignoring them. The strongest sequences feel effortless because the hard decisions happened before the viewer ever saw the first frame.


Reader Comments
The conversation starts with you.
Your Comment