In this Article
- The Overwhelm of Arrival
- Pre-Arrival Digital Scouting
- On-the-Ground Purposeful Walking
- Executing Long-Exposure Captures
- Workflow Refinement and Review
The Overwhelm of Arrival
A new city rarely presents itself as a clean composition. It arrives as transit noise, unfamiliar street geometry, glass reflections, tired judgment, and too many possible directions at once.
The first decision is not where to shoot. It is how to slow the city down mentally. A photographer who steps from a station or hotel lobby and immediately starts changing lenses has already let the environment set the pace. The stronger move is quieter: establish a small working zone, identify one visual theme, and postpone gear decisions until the scene has been read.
Reduce the city to a working radius
Training logs show a consistent pattern in unfamiliar-city shoots: the first frames often serve the photographer more than the portfolio. They absorb nervous energy. They confirm that the camera works. They rarely reflect the most deliberate seeing of the day.
Use the first 20-35 minutes after arrival for orientation rather than shooting. During that interval, locate pedestrian flow, transit noise, reflective surfaces, elevated viewpoints, and areas where tripod use will not block foot traffic. This is not delay; it is visual triage.
Choose one working radius for the first session, such as a 6-10 block area, instead of trying to cover the entire city center. The narrow boundary improves comparison. One waterfront block, one bridge approach, and one adjacent plaza can teach more about light direction and access than a frantic march across landmarks.
Pick one first image goal
The first image goal should stay narrow: one skyline frame, one street-level motion frame, or one architectural detail study. That constraint protects attention. It also keeps the photographer from evaluating every doorway, tower, and traffic pattern as if each deserves equal time.
Risk Factor: Arrival excitement can masquerade as productivity. If the tripod comes out before the photographer understands pedestrian rhythm, reflective surfaces, and access constraints, the first setup may consume the best light without producing a coherent frame.
This is where long exposure changes the discipline of arrival. A conventional street photograph can react quickly to gesture. A long-exposure city frame needs stillness against motion: a railing against blurred pedestrians, a stone curb against light trails, a fixed skyline against moving clouds. The first pass through the city should search for that opposition before it searches for drama.
Pre-Arrival Digital Scouting
What should the photographer scout before travel: the famous viewpoints, the transportation routes, or the light?
The answer is sequence. Start with the map view, move to satellite view, then check street-level imagery only after likely compositions have been marked. This order prevents the photographer from becoming trapped by someone else’s eye-level photograph of the location. Map first, perspective second, confirmation third.
Build a short candidate list
Scout 3-5 candidate locations before travel. A balanced list includes one elevated view, one water or reflective surface, one traffic-motion location, and one fallback location close to lodging. The fallback matters more than it sounds. Rain, fatigue, delayed trains, or restricted access can turn a nearby option into the most useful location of the trip.
Satellite view helps identify scale. It reveals whether a plaza has enough open space for a tripod, whether a waterfront path faces the skyline, and whether a bridge aligns with traffic or cuts across it awkwardly. Street-level imagery then answers smaller questions: rail height, sidewalk width, bus stop clutter, construction fencing, glass barriers, and the practical issue of where a photographer can stand without becoming part of the obstruction.
Read the light window before choosing gear
Check sunrise, sunset, and civil twilight windows for the specific date of the shoot. Long-exposure city work often becomes productive from roughly 25 minutes before sunset through about 40 minutes after sunset, especially when illuminated windows, traffic, and Blue hour sky color begin to balance.
When evaluating bridges, plazas, or waterfronts, look for stationary foreground anchors such as railings, bollards, lamp posts, steps, piers, or pavement patterns. These elements will remain sharp while people, clouds, or vehicles blur. Wide plazas can look promising in map view and disappoint on site if they lack a fixed anchor. Blur needs resistance; otherwise it reads as softness rather than intention.
Recommendation: Save each candidate location with a short purpose note, not just a pin. A useful note reads like “low bridge railing for traffic trails toward tower,” not “nice view.”
A pre-scouted rooftop or bridge view may still fail because a temporary barrier, locked access point, vibration, or reflective glass makes the planned composition unusable. Digital scouting should create options, not obligations.
On-the-Ground Purposeful Walking
Beginners often treat urban scouting as a treasure hunt. Advanced photographers treat it as a field test.
The difference shows in the walking pace. Random wandering asks, “Is there something interesting nearby?” Purposeful walking asks sharper questions: Where do people pause? Where do headlights enter the frame? Does the bridge deck vibrate? Which foreground object can hold the composition still when the shutter stays open?
Walk before opening the tripod
Walk each candidate scene without opening the tripod for the first 5-8 minutes. This short inspection reveals patterns that static digital scouting cannot. Delivery cyclists may cut through the cleanest foreground. A security guard may redirect tripod users away from the most obvious corner. Passing buses may shake the pavement at intervals that matter for multi-second exposures.
Before committing, test compositions from at least three heights: eye level, waist level, and a low angle near the foreground anchor. The low angle may exaggerate pavement lines or railings. Waist level often reduces converging verticals without losing street energy. Eye level can work when the architecture supplies order, but it can also produce a familiar postcard distance.
Compare the planned frame with the actual frame
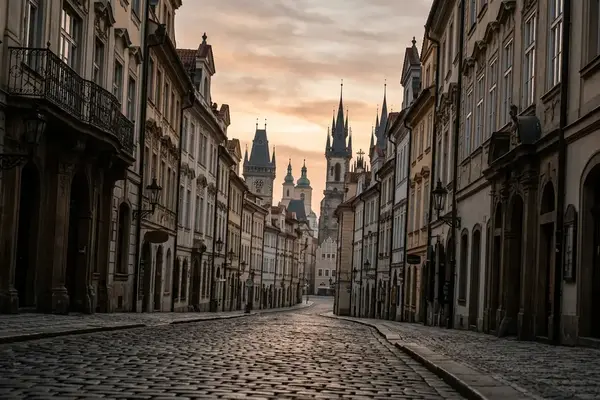
A city with wet pavement after rain can turn an ordinary traffic scene into a stronger long-exposure subject, while the same location in dry midday light may look flat. That shift should change the plan. Reflections may become the subject. A darker wall may become the tonal counterweight. A curbside puddle may supply the foreground anchor that the map never promised.
For long-exposure street scenes, favor traffic moving diagonally across the frame or toward a vanishing point. Side-to-side traffic can flatten the image unless the architecture supplies strong vertical structure. The photographer should compare these motion paths on site rather than assume that any busy street will generate useful light trails.
Field experience revealed a useful distinction: the best location is not always the most dramatic location. It is the location where fixed structure, moving elements, light direction, and safe tripod placement can cooperate long enough for a disciplined exposure sequence.
Executing Long-Exposure Captures
Exposure decisions should start with the desired motion effect, not with the filter pouch.
First decide whether motion should become a soft veil, faint ghosting, or clean light trails. Then choose shutter speed, neutral-density strength, aperture, and ISO around that intention. This backward method keeps technique subordinate to the visual outcome.
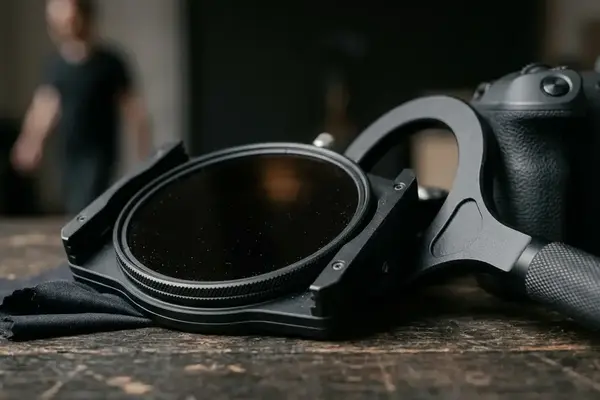
Select the filter after defining motion
For moving water or soft pedestrian blur in daylight, start testing around 1-4 seconds with a moderate neutral-density filter. For cloud movement or a more minimal architectural scene, test 20-60 seconds depending on wind speed and sky texture. In bright afternoon conditions, a stronger neutral-density filter may be needed to reach multi-second exposures without forcing the aperture beyond a sharp working range.
The mistake to avoid is treating the densest filter as the most serious choice. Heavy neutral density can strip a city scene of the small movements that give it urban character. A crosswalk may need ghosting rather than erasure. A waterfront may need faint cloud movement rather than a blank sky.
Protect highlights while preserving tonal room
Review the histogram after the first serious frame, not after the entire sequence. Illuminated signs, windows, and specular reflections can clip quickly during Blue hour, especially when the sky still carries color and the city lights have already intensified. Preserve enough shadow information for later tonal shaping, but do not let glowing signage dictate the whole exposure unless it carries compositional importance.
Use a cable release, self-timer, or touch-free trigger, and recheck tripod footing after buses, trains, or groups of pedestrians pass nearby. Bridge vibration, platform movement, and sidewalk pressure can soften an otherwise sound exposure. The blur should come from the subject, not from the camera support.
Critical Insight: Long exposure rewards previsualized motion. A shutter speed becomes meaningful only when the photographer can name what should blur, what should stay sharp, and what tonal detail must survive editing.
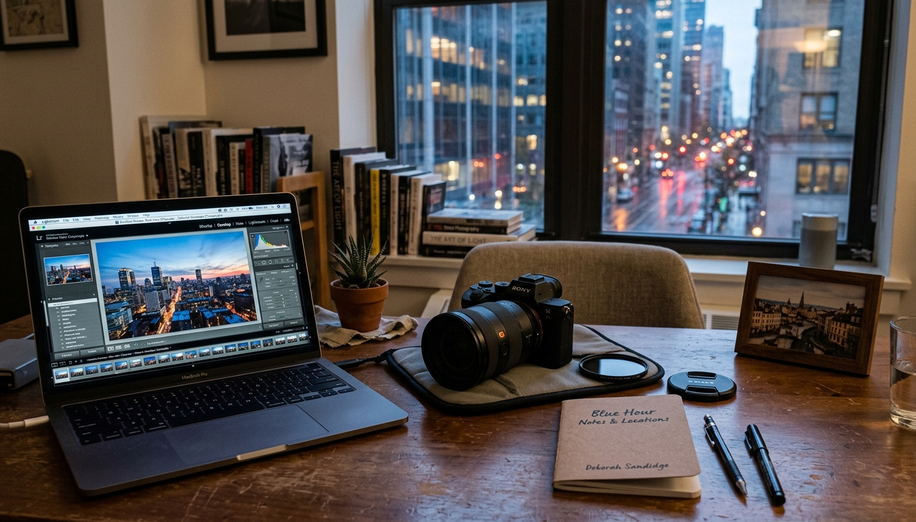
Post-processing choices should respect that field decision. Nik Color Efex Pro can help refine contrast and color separation in Blue hour scenes, while Nik Silver Efex Pro can strengthen architectural rhythm when color distracts from line and luminance. Neither tool rescues an exposure that lacks a stable anchor or a clear motion idea.
Workflow Refinement and Review
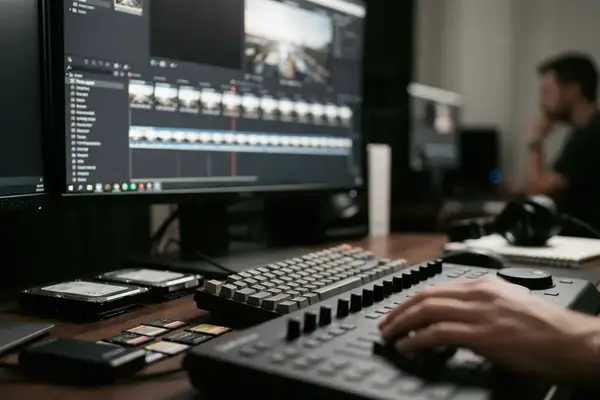
The review stage turns the city shoot into reusable knowledge. It should not begin and end with choosing favorites.
A strong frame deserves a short explanation. Record why it worked: the exact shooting position, light direction, obstruction issues, crowd behavior, lens range, filter strength, and shutter speed family. These notes build a practical archive for future trips, workshops, and return visits.
Review while the city is still fresh
Tag keepers and near-misses within 24-48 hours while memory of light, crowd flow, and access problems remains reliable. Waiting too long weakens the connection between the file and the field condition that shaped it. A near-miss may prove more useful than a polished keeper if it identifies the condition required for a second attempt.
Keep a short location note for each successful setup: arrival time, tripod position, lens range, filter strength, shutter speed family, and the condition that made the frame work. A note such as “traffic trails improved after wet pavement reflected signals” gives the photographer a repeatable cue. A note such as “nice bridge at night” does not.
Separate repeatable patterns from local exceptions
Flag locations that need a second attempt under different conditions, such as lower wind, wet pavement, lighter pedestrian traffic, or a brighter twilight sky. This practice keeps the workflow analytical rather than sentimental. It also prevents one disappointing session from falsely condemning a location with strong structure.
The method has limits. This workflow is strongest in walkable urban districts; sprawling cities with limited pedestrian access, strict tripod rules, or heavy security screening require more location-specific planning before arrival. That constraint does not weaken the workflow. It clarifies where the photographer must adapt it.
Unfamiliar City Long-Exposure Field Checklist
- Mark 3-5 candidate scenes before arrival, including one fallback close to lodging.
- Arrive at the first location 25-40 minutes before the preferred light window.
- Use the first 20-35 minutes in the area for orientation, not automatic shooting.
- Choose one working radius for the first session, such as a 6-10 block area.
- Walk each candidate scene for 5-8 minutes before opening the tripod.
- Test compositions from eye level, waist level, and a low angle near the foreground anchor.
- Choose shutter speed from the desired motion effect before selecting the neutral-density filter.
- Review the histogram after the first serious frame and protect critical highlights.
- Record the successful position, light condition, filter strength, and shutter speed family within 24-48 hours.
An unfamiliar city becomes manageable when the photographer stops asking it for everything at once. The repeatable workflow narrows attention, tests reality against scouting, and turns each exposure into evidence for the next decision. That is the practical value: not rigid control, but a disciplined way to remain responsive when light, movement, and access keep changing.


Reader Comments
The conversation starts with you.
Your Comment