Why Standard Infrared Rarely Satisfies
The capture is only the first half of the photograph
A raw infrared file can be technically faithful and visually disappointing at the same time.
The sensor may record the invisible-light response clearly, yet the first rendering often looks flat: pale foliage, muddy skies, and color that feels trapped between monochrome and false color. That is not a failure of the capture. It is a reminder that the creative decision begins after capture, not at the shutter.
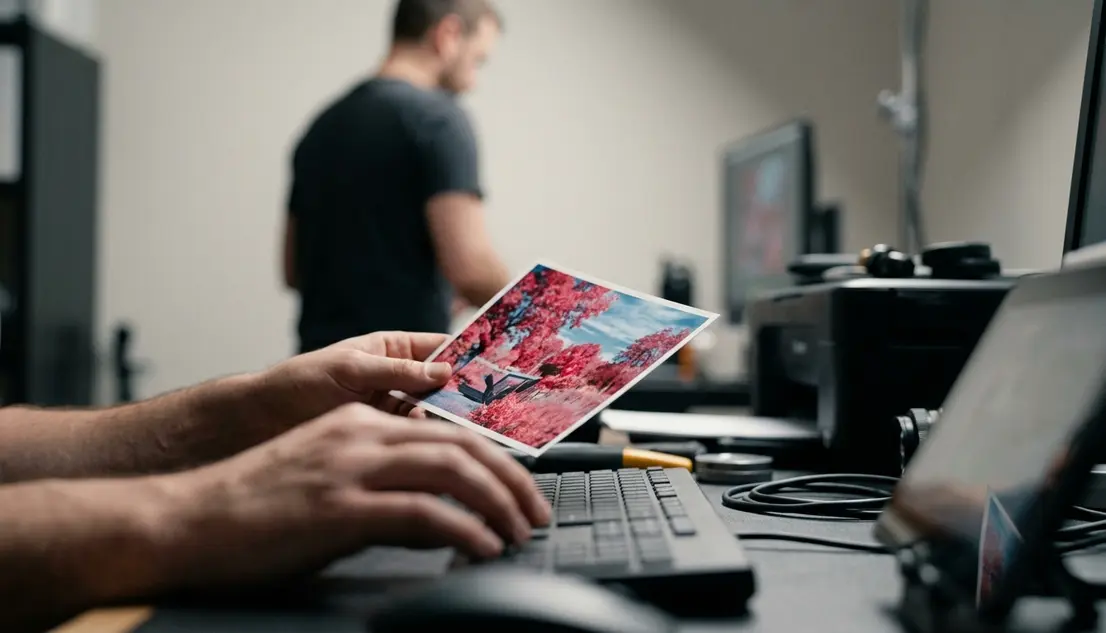
Field experience revealed this most clearly in a simple scene: a sunlit tree against a clean sky. Before processing, the file may look beige and low in separation. After a disciplined red-blue channel exchange, the same file can separate into luminous foliage and a controlled cyan-blue sky. The subject did not change. The spectral relationships did.
Critical Insight: False-color infrared is not a preset look. It is a controlled reassignment of channel information, and it works best when the capture contains enough separable color information to begin with.
Why some files respond better than others
False-color infrared files from 590 nm and 665 nm conversions usually retain more usable visible-color information than deep 720 nm files. That visible leakage gives Photoshop something to separate when the red and blue channels are exchanged. A 720 nm file with very little visible color may swap technically correctly but still produce a restrained, almost monochrome result.
The strongest candidates are scenes with sunlit foliage, open sky, water, stone, or architecture. Those subjects tend to separate cleanly because they reflect infrared and visible wavelengths differently. A sunlit tree against a clean sky usually responds more dramatically than shaded woodland, where foliage and background can collapse into similar tones.
This is where infrared processing differs from ordinary color grading. In a conventional blue hour long exposure, I can often lean on familiar sky and shadow relationships. In false-color infrared, I have to ask a more basic question first: does the file contain distinct spectral responses, or am I trying to manufacture color from channels that already match too closely?
Preparing Raw Infrared Files for Channel Work
Start conservatively, because the swap magnifies errors
Preparation matters because the channel swap does not politely hide earlier mistakes. It amplifies them.
Begin with the raw file, not a compressed derivative. Leave the raw conversion untouched as the source and move into Photoshop through a non-destructive working file such as PSD or TIFF. Open or export the file as 16-bit/channel rather than 8-bit/channel so later hue shifts have smoother gradients to work with.
For a beginner, the most tempting move is to rush into Channel Mixer because the red-blue swap feels like the defining trick. Resist that impulse. Set infrared white balance first, apply lens correction, establish basic exposure, recover highlights where possible, and clean up chromatic problems before mixing channels. The cleaner the starting file, the less aggressive the finishing work needs to be.
White balance before Photoshop
Set infrared white balance before the channel mixer step. A foliage-based custom white balance commonly gives a more neutral starting point than a standard daylight setting. If the custom white balance is too warm before the swap, the sky may turn violet-gray instead of clean blue.
Exposure also deserves restraint. Infrared foliage can become very bright, and clipped foliage highlights cannot recover texture simply through channel mixing. Protect the bright leaves before you start thinking about surreal color.
Recommendation: Prepare the file in this order: white balance, exposure control, highlight recovery, lens correction, chromatic cleanup, then Photoshop channel mixing.
Channel Swap Working Checklist
- Start from the raw file and set infrared white balance before Photoshop editing.
- Open or export as a 16-bit/channel PSD or TIFF.
- Apply lens correction, basic exposure, highlight recovery, and chromatic cleanup before the channel mixer step.
- Create a Channel Mixer adjustment layer.
- Set Red Output Channel: Red 0, Blue 100.
- Set Blue Output Channel: Red 100, Blue 0.
- Leave Green Output Channel at Green 100 unless a strong green or cyan cast needs correction.
- Keep Monochrome unchecked.
Executing the Channel Swap in Photoshop
The specific values
The core move is precise. In Photoshop, create a Channel Mixer adjustment layer. Set the Red Output Channel so Red is 0 and Blue is 100. Then set the Blue Output Channel so Red is 100 and Blue is 0.
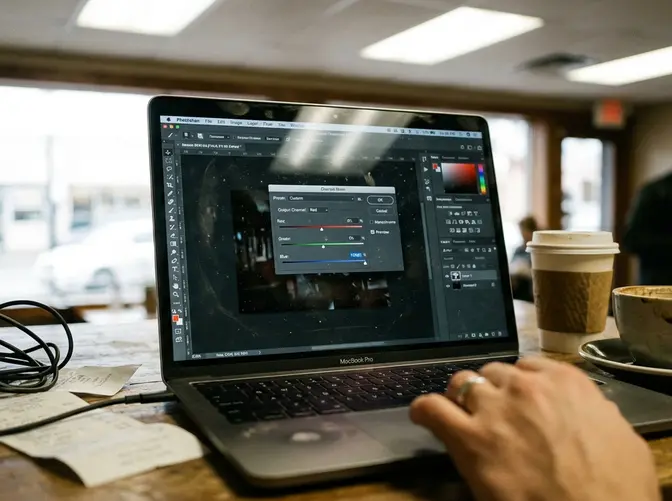
Leave the Green Output Channel at Green 100 unless the file has a strong green or cyan cast. Do not enable the Monochrome checkbox. That checkbox removes the false-color separation this method depends on.

Where the layer belongs
Keep the Channel Mixer layer above the base image and below later hue, saturation, curves, or selective color adjustments. This order preserves the tonal structure of the raw conversion while giving later color corrections a stable relationship to refine.
The common question is simple: should contrast come before or after the swap? I usually treat contrast as a finishing decision after the channel relationship is established. If contrast is pushed too hard before the swap, foliage and sky can separate in a brittle way, and later color work may exaggerate halos or clipped edges.
- Open the prepared 16-bit/channel PSD or TIFF in Photoshop.
- Create a Channel Mixer adjustment layer above the base image.
- Select the Red Output Channel and set Red to 0, Blue to 100.
- Select the Blue Output Channel and set Red to 100, Blue to 0.
- Confirm that the Green Output Channel remains Green 100 unless the file needs cast control.
- Leave Monochrome off.
- Add hue, saturation, curves, or selective color adjustments above the Channel Mixer layer.
At this stage, do not chase the final look. The purpose of the swap is to create a workable color relationship, not to finish the photograph in one adjustment layer.
Refining Hue and Saturation After the Swap
Work by color family, not by the whole frame
After the swap, the file usually needs restraint more than drama.
Use Hue/Saturation or Selective Color to steer a cyan-blue sky away from purple if needed. Tune skies separately from foliage because the same hue move that makes the sky luminous can push leaves into a harsh, synthetic yellow. Architecture deserves its own treatment as well, especially stone, concrete, and painted surfaces that may pick up unwanted color from the swap.
Masked adjustment layers give better control than one global saturation layer. Use one mask for the sky, one for foliage, and one for architectural surfaces when the scene calls for it. This keeps the image natural enough to read as a photograph while still allowing the surreal quality that makes false-color infrared compelling.
Avoiding posterization
Large hue rotations can break smooth gradients, especially in skies. Reduce saturation before major hue shifts when skies show banding or abrupt color steps. Then bring saturation back gradually after the hue sits in the right family.
Check smooth gradients at 100% view before saving a web version. Posterization often hides when the image is zoomed out, then appears clearly in the exported file. This matters if the photograph will receive further finishing in Nik Color Efex Pro or a monochrome interpretation in Nik Silver Efex Pro, because those tools can make weak gradients more visible.
Risk Factor: A global saturation increase can make a swapped infrared file look colorful quickly, but it can also destroy subtle sky transitions and turn foliage into flat blocks of color.
A useful finishing rhythm is modest: correct the sky first, soften excessive foliage saturation second, then use curves or selective color for separation. If the image needs more intensity after that, add it locally rather than globally.
Scope and Limitations of This Technique
Why the recipe is not universal
The red-blue channel swap is a starting recipe, not a universal look. Sensor conversion type, filter cutoff, white balance accuracy, subject reflectance, and the raw converter’s color profile all influence the result.
Deep 720 nm infrared files often produce less varied false color because much of the visible spectrum has already been filtered out. Mixed lighting, heavy shade, and underexposed foliage can also reduce separation after the swap. In those cases, pushing hue and saturation harder does not create new information. It usually makes the weakness more obvious.
This guide assumes a color infrared capture or conversion with enough residual channel separation to support false-color editing; near-monochrome infrared files need a different finishing approach.
When to stop
The cleanest false-color infrared files still obey the capture. If foliage highlights are clipped, channel mixing cannot restore leaf texture. If the sky and foliage entered the edit with nearly identical channel values, the swap may produce only a narrow tonal shift. When the scene was made in heavy shade, the image may need a more restrained color treatment than a sunlit architectural scene.
That limitation is not discouraging. It gives the method its discipline.
Choose the channel swap when the file contains separable information: sunlit foliage, open sky, water, stone, or architecture. Use a quieter finish when the file leans toward deep infrared monochrome. The strongest false-color work does not force every capture into the same palette; it reads the spectral evidence first, then decides how far the color can go.
Reader Comments
The conversation starts with you.
Your Comment