
Stretching Seconds into Minutes Under a Zenith Sun
Photographers typically abandon coastal landscapes when the sun reaches its peak. Midday contrast is at its absolute maximum, bleaching water, stone, and sky into harsh, unyielding zones of pure white and deep shadow. The working question for long exposure photography becomes a matter of physics: how do you keep a multi-minute shutter open when the ambient light demands a fraction of a second? Silky water and streaked clouds still require seconds that stretch into minutes to register properly on the sensor. Water that changes direction around rocks or pilings generally reveals more layered motion during a two-to-four minute exposure than during a brief exposure of several seconds.
The 15-stop neutral density filter solves this specific environmental conflict. It operates as the exact density required to make high noon usable. Rather than treating extreme density as a specialty tool reserved for the blue hour, mounting fifteen stops of glass at midday forces the camera into a completely different operational bracket. It subdues the zenith sun just enough to allow the shutter to remain open while the surf completes multiple cycles of advancing and retreating across the shoreline.
Calculating the Optical Density Multiplier for Daylight
Optical density functions as a strict light-reduction ratio rather than a subjective mood preset. Each stop of density halves the volume of light that reaches the sensor. When a manufacturer uses standard optical-density notation, a fifteen-stop filter corresponds to an optical density of 4.5. This mathematical reality dictates the exposure time.
Comparing a 6-stop or 10-stop filter at midday with a true 15-stop piece of glass reveals the limitations of thinner density. Thinner glass still leaves shutter times far too short to achieve milky water when the sun sits directly overhead. Fifteen stops require 2^15, or 32,768 times, the unfiltered shutter duration. The theoretical jump from a sunlit base exposure—typically a fast shutter at low ISO and a mid-range aperture—into the bulb-range minutes relies entirely on this massive multiplier.
The filter extends time, but it possesses distinct physical limitations. It cannot restore detail already clipped in the unfiltered test frame. It also cannot make a solar disk safe to view or photograph directly through the optical viewfinder.
| Filter density | Time multiplier | Calculated shutter | Field setting |
|---|---|---|---|
| 6 stops | 64× | 0.256 second | 1/4 second |
| 10 stops | 1,024× | 4.096 seconds | 4 seconds |
| 15 stops | 32,768× | 131.072 seconds | 2 minutes 10 seconds |
Establishing the Base Exposure Before Mounting Glass
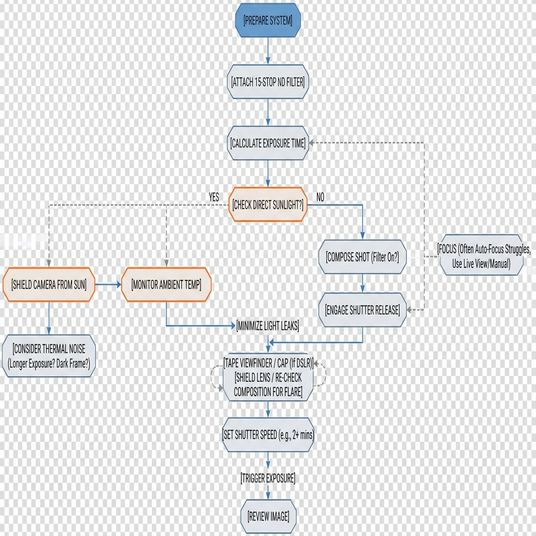
The exposure sequence is built backward from the desired motion. You must first decide whether the water needs tens of seconds or several minutes to blur effectively. Meter the unfiltered highlights to determine whether fifteen stops will move that initial reading into the intended bulb interval. With the filter still off the lens, fix the ISO and aperture so only the time variable will change. Make a test frame and check the brightest foam and cloud structures on the histogram.
Convert the stops to a time multiplier. For a base reading of 1/250 second, multiply the unfiltered shutter time by 32,768 to reach 131.072 seconds. A base reading of 1/125 second becomes 262.144 seconds. A tiny fraction of a second expands into several minutes of continuous exposure.
The 1/250-to-2:10 noon conversion chain requires strict adherence to the base reading — practical use of high-density filters bears that out. A workable timer entry for a calculated 131.1 seconds is 2 minutes 10 seconds. Rounding upward to 2 minutes 15 seconds adds exposure where noon foam and pale stone may already sit dangerously close to clipping. For a calculated 4 minutes 22 seconds, executing a 4-minute trial serves as a deliberate short first frame. That keeps roughly 22 seconds of highlight margin for evaluation. The first completed bulb frame then becomes the definitive exposure reference for the rest of the session.
Securing the Focal Plane Before the Viewfinder Darkens
Compose, level, and focus the camera with the 15-stop filter completely off the holder. Once the dense glass is seated in the slot, the optical viewfinder and most autofocus systems go effectively blind. The camera can no longer see the scene to confirm sharpness.
Use live-view magnification on a hard, high-contrast edge before mounting the filter. Inspect both the near structural detail—such as a wet rock or a wooden piling—and the distant horizon plane. Choose the aperture for optical sharpness first. Moving from f/8 to f/16 adds two stops of light reduction, which turns a 2-minute exposure into roughly 8 minutes without changing the filter density at all.
Locking the Focus Ring with a Tape Bridge
After focus locks, switch the lens to manual focus immediately. Apply a narrow tape bridge spanning the fixed lens barrel and the focus ring. This physical marker makes even a small ring displacement visible before the bulb exposure begins, ensuring a bump on the jetty does not throw the plane out of alignment.
Seat the filter holder gently. Perform a physical check to verify that neither the focus ring nor the zoom mechanism moved during the installation. A reliably sharp frame rests entirely on this mechanical discipline.
Sealing the Optical Path Against High-Angle Rays
Treat the high midday sun as a relentless leak amplifier. Light that remains completely harmless in a half-second frame will aggressively fog a four-minute noon exposure. This stray light enters through the camera's eyepiece, the holder gasket, or a loose filter slot.
Blind the viewfinder with the camera's built-in eyepiece shutter or a dedicated cap before the bulb run starts. Inspect the square-filter holder from the side while the sun is high. Look closely at the holder gasket, unused filter slots, the adapter-ring junction, and the top edge of the square filter before every multi-minute run. Noon rays arriving from steep overhead angles find these hairline gaps first. A leak that is inconspicuous at 1/2 second accumulates continuously through a 4-minute bulb exposure, ruining the file.
While meticulous sealing prevents most peripheral light intrusion, extreme zenith angles occasionally bypass even premium gaskets. Shade the rear of the holder with a dark cloth or a rigid flag. Position this shade far enough forward that it cannot enter the frame or touch the tripod during the exposure. The first long frame must be judged at its edges and darkest tones before any composition or processing changes are made. Magenta bands, bright corners, or a black point that lifts on only one side trigger an immediate physical seal inspection.
Managing Thermal Shift and Flare in Direct Sun
Overhead sun physically heats dark ND glass. Expect a warmer or uneven color cast on long runs as the temperature of the filter rises. Between consecutive bulb frames, move the glass into open shade. Inspect it for condensation, salt spray, or uneven warming before it is handled. Let the filter cool in the shade during image review instead of wiping a hot surface immediately.
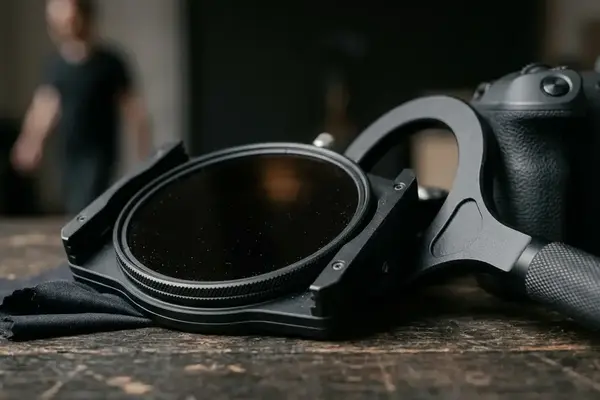
Prefer a single 15-stop filter over a stacked combination of a 10-stop and a 6-stop filter whenever possible. Two filters create four exposed air-glass surfaces, while one filter creates only two. Extra air-glass surfaces at noon breed flare and introduce additional perimeter planes where light leakage can begin. A single piece of glass gives the cleanest optical path.
Keep the sun itself out of the frame entirely. Flag the front element when the sun sits just off-axis. A 15-stop filter does not make the sun harmless; it only slows the exposure. Environmental stability also matters in direct sun. Keep tripod legs short, lock every leg section and head control tightly, and wait for retreating surf to stop vibrating the ground before starting the timer.
Restoring Local Contrast to Flat Raw Files
Expect the raw noon file to look remarkably flat, slightly cyan or magenta, and low in local contrast once fifteen stops of density have sat on the lens. Raw correction begins with neutralizing the filter cast. Use a known-neutral gray reference photographed in the same open shade as the jetty stone to establish a baseline.
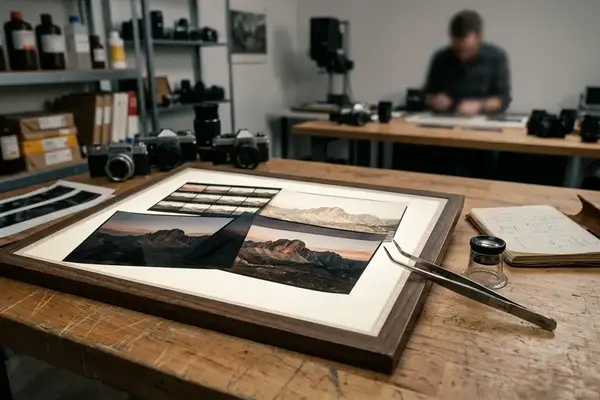
Correct the white balance and broad tonal placement before applying local contrast or clarity. Recover structure in the stone and foam with targeted local contrast, avoiding a global punch that turns silky water into plastic sheeting. Mask the stone, pilings, and foam separately so the texture added to hard surfaces does not create brittle, unnatural edges across the smooth water.
When converting these flat files to monochrome, tools like Nik Silver Efex Pro excel at isolating the midtone micro-contrast in the concrete pilings. For color workflows, Nik Color Efex Pro provides targeted structure adjustments that leave the ethereal water untouched. Protect the highlight roll-off in the brightest water at all costs. Midday specular highlights that survived the heavy ND filtration will still clip permanently if the white point is dragged too far to the right. Check the brightest water at full image view and at 100% magnification; a white-point adjustment that erases the delicate separation between adjacent foam tones has gone too far.
Executing a Four-Minute Exposure on the Concrete Jetty
The tripod stands low on the concrete jetty, legs locked against the vibration of the incoming tide. Overhead, the sun casts hard, vertical shadows against the pilings. The camera is already leveled and focused on the weathered texture of the nearest concrete block. Fifteen stops of glass slide smoothly into the holder, sealing against the foam gasket. The eyepiece is capped tight.
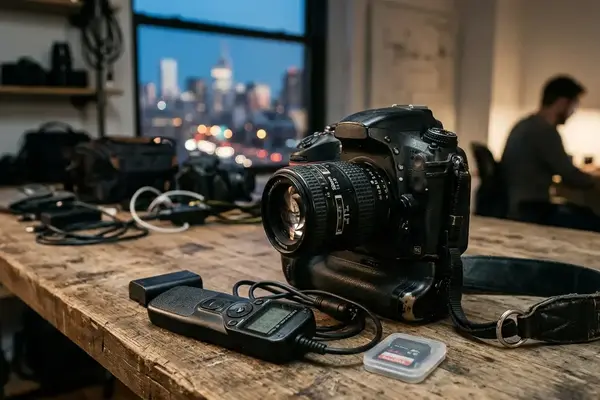
The photographer dials in the four-minute bulb exposure, holding the ISO and aperture at the exact values established by the unfiltered test frame. A remote timer starts. Hands clear of the gear, the photographer steps back from the tripod and waits out the surf as it crashes and recedes against the pilings over and over again.
When the timer finally beeps, the shutter snaps closed. The playback screen illuminates in the harsh daylight. Evaluation follows a strict order: check the highlights first, look for leak signatures in the corners, inspect for vibration on the concrete edges, and only then assess the overall color and contrast. The file shows continuous milky water wrapped smoothly around sharply defined pilings. Dark tones at the frame edge remain neutral and deep. The jetty-frame boundary is clear: fifteen stops turned the breaking surf into a four-minute veil, capturing a file that only needs modest contrast to hold the intense midday hour it was actually shot in.







Reader Comments
The conversation starts with you.
Your Comment