An Exhaustive Breakdown of Drop-In Filter Systems for Ultra-Wide Lenses
/ 9 min read
Where a Drop-In Filter Sits in the Light Path
A drop-in filter system uses a mechanical cassette to park a circular or square optical plate in a dedicated slot. Nothing threads onto the lens. The holder establishes the plate’s position, keeps it square to the optical axis, and prevents movement during the exposure.
Two placements fit that definition. A rear cassette occupies the space behind the last lens element, close to the mount. A front cassette forms part of a hood or clamp and suspends a larger plate far enough ahead of the lens to clear its convex front element.
The lens geometry determines which placement works. Once an ultra-wide front element projects forward as a bulbous dome, a cassette becomes the stable route for introducing neutral density, color correction, polarization, or a graduated transition. The choice of filter effect comes later.
Rear and Front Paths
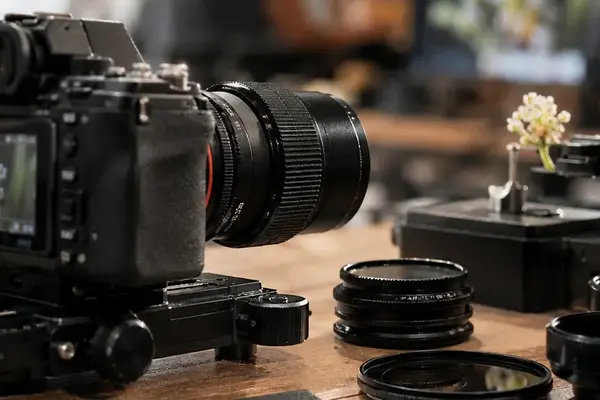
A rear cassette presents a small plate to converging rays that have already passed through the lens formula. A hood-mounted system commonly takes 100 mm or 150 mm plates in front of the lens, where incoming rays have yet to reach the first optical surface.
That positional difference governs handling, flare behavior, weather exposure, and the kinds of adjustments available while composing.
Why a Bulbous Ultra-Wide Rejects Threaded Rings
Rectilinear ultra-wides and fisheyes must accept rays from an exceptionally broad field. Their front groups often project beyond the barrel so the entrance pupil can see those oblique ray bundles. The resulting dome offers neither a flat seating face nor a parallel rim for a conventional filter thread.
Placing a slim threaded ring around that dome would introduce a physical boundary directly into the corner-ray bundles. The frame records the obstruction as fixed dark corners, and the cutoff becomes more likely as focal length shortens or the holder extends farther forward. Exposure changes will not move or soften those corners because the cause is mechanical.
Stacking rings deepens the obstruction. Even if a custom ring clears the center of the glass, its rim may still clip the extreme image area.
Polarization Across a Wide Sky
A polarizer also needs to rotate as a plane around the optical axis. Curved front glass cannot provide that controlled seating plane. On an ultra-wide view, polarization across open sky may already vary with the angle to the light; an improvised ring around a dome adds mechanical uncertainty before composition begins.
Read the Corners
A hard, stationary corner indicates holder intrusion. Gradual shading may belong to the lens, while an asymmetric edge usually points to a ring, rail, or hood sitting off-axis.
Loading a Rear Cassette Behind the Last Element
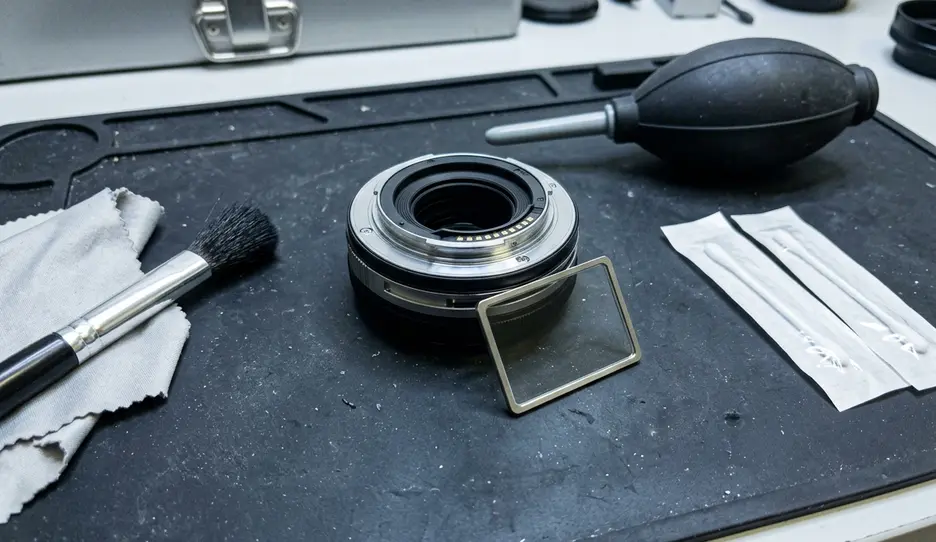
The rear holder is compact because it intercepts a narrower light path near the mount. It occupies a factory-designed slot or a mount-side gap and presents a small plate to rays already bent by the lens optics. Uniform neutral density and color-correction plates suit this position well.
I treat cassette loading as a mechanical operation rather than a casual filter change. The camera stays supported, and my fingers touch the plate’s frame instead of its optical faces.
Three Checks Before the Shutter Opens
Open the cassette without twisting the lens or pressing against the camera.
Lower the holder squarely until both guide rails engage.
Confirm that the shoulder sits flush and the latch closes completely.
Those checks matter during a long exposure. A plate that begins slightly skewed can drift in its rails, alter the frame edge, or compromise the cassette seal while the shutter remains open.
The small plate requires less glass and stays shaded inside the mount. Its proximity to the sensor-side path makes cleanliness demanding, however. Dust, salt residue, and fingerprints on a rear plate can print more readily than the same contamination on a front filter.
A rear cassette also fixes the plate’s position. It cannot slide a graduated transition up or down to meet a horizon, which reserves that task for a front rectangular system.
Aligning a Hood-Mounted Slot Around the Dome
A front drop-in holder attaches to a dedicated hood or lens collar, never to the optical glass. Its slot stands ahead of the dome so a large plate can pass across the lens without contact. A 150 mm system offers more clearance around a strongly convex element than a smaller 100 mm system, though holder geometry still controls the usable image area.
Separate Rail Intrusion From Lens Shading
Seat the collar first. View the slot from above and from the side, checking that the plate plane remains centered and square to the optical axis. Then make a test frame using the full image area.
A tilted rail can cast a hard dark edge that resembles severe lens vignetting. The useful clue is asymmetry: natural lens shading tends to follow the optical field, while cassette intrusion usually favors one corner or one side. Re-centering the holder should remove the edge without changing exposure.
Front slots earn their extra bulk through movement. A graduated plate slides vertically until its transition meets the horizon. Polarizers rotate around the optical axis after the camera has been leveled. Those controls remain accessible while the composition stays locked.
Accounting for Flare, Vignetting, and Filter Flatness
Every solid plate adds two air-glass surfaces to the optical path. On an ultra-wide composition that includes bright sky, direct sun, or reflections from wet ground, each boundary can produce ghosts or lower local contrast.
The rear plate works inside a shaded, baffled tunnel. Up front, the plate meets stray skylight, spray reflections, and direct illumination before the rays enter the hood. Good coatings and effective shading therefore carry more weight at the front position.
Test Beyond the Visible Frame
Make one flare check with the sun inside the composition. Then shift the test so the sun sits immediately beyond each upper corner. Off-frame light can reveal a reflection that remains hidden when the sun is centered, especially with a large plate exposed ahead of the hood.
Sharpness follows the flatness, surface quality, and coating behavior of the specific plate. The drop-in mechanism alone does not determine resolution. Evaluate fine detail near the center and edges, then compare contrast around bright boundaries.
Optical predictions remain plate- and lens-specific. A clean result on one ultra-wide and holder combination cannot certify another combination.
Test the Sun Twice
Inspect the filter with the light source both inside and just outside the frame. A single centered-sun exposure leaves the most troublesome off-axis reflection path unchecked.
Changing Density Without Moving a Locked Composition
The field advantage appears after the tripod head is leveled and locked. A cassette allows the photographer to change density without unscrewing a front ring, rotating the hood, or shifting the carefully placed horizon.
Complete the composition through a clear plate or the manufacturer-specified matched empty carrier. This preserves the intended optical path while focus, foreground reach, and frame edges are established. Lock pan and tilt before touching the latch.
Keep Pressure Off the Camera
Support the cassette frame with one hand and operate the latch with the other. After inserting the replacement, compare all four frame edges with the original composition. The center can appear unchanged even when slight pressure has moved an edge relative to the horizon or foreground.
Weather turns the exchange into a rail-management problem. Carry rear plates in individual rigid sleeves, dry the cassette rails before reinsertion, and inspect the gasket. Wiping only the plate may drag water straight back into the slot, where it becomes difficult to remove during a sequence.
Lock Before Density
Seat the cassette and clear plate before planting the tripod.
Level the horizon and inspect every corner at 14 mm.
Lock pan and tilt before changing density.
Keep the optical path matched with the specified clear plate or carrier.
Working a 14 mm Shoreline From Clear Glass to Heavy ND
Consider a wet shoreline at dawn with a 14 mm rectilinear prime. Mount the camera on a settled tripod, level the head, and install the rear cassette with its clear plate before first light. Keep a moderate neutral-density plate and a stronger plate in separate rigid sleeves.
A Copyable Dawn Sequence
Establish the frame through the clear plate. Level the horizon in the finder, place the wet foreground, confirm focus, and inspect every corner for rail intrusion. Meter the pre-dawn water and make the first exposure while retaining highlight margin in the brightening sky.
Lock the composition. Tighten pan and tilt, then compare the horizon and foreground against the frame edges. Leave the tripod head untouched for the rest of the sequence.
Insert moderate density. Support the rear cassette, release its latch, remove the clear carrier, and seat the moderate neutral-density plate with both rails engaged. Check the flush shoulder, close the latch, and make the next exposure as the sky lifts.
Move to stronger density. When direct light reaches the water, exchange the moderate plate for the stronger neutral density. Recheck the frame edges, meter again, and make the longer exposure that smooths the moving water while preserving the original horizon placement.
Add reflection control only if needed. If glare remains on the wet sand, fit the hood-mounted holder and rotate its polarizer around the leveled optical axis. Leave the rear density in place when the holder design permits both filters; otherwise replace the rear plate according to the system’s supported configuration.
Finish with the same locked view. Dry the rear rails before packing, return each plate to its rigid sleeve, and make the final polarized long exposure from the unchanged 14 mm composition.










Reader Comments
The conversation starts with you.
Your Comment