

A Landscape Trick That Followed Faces Indoors
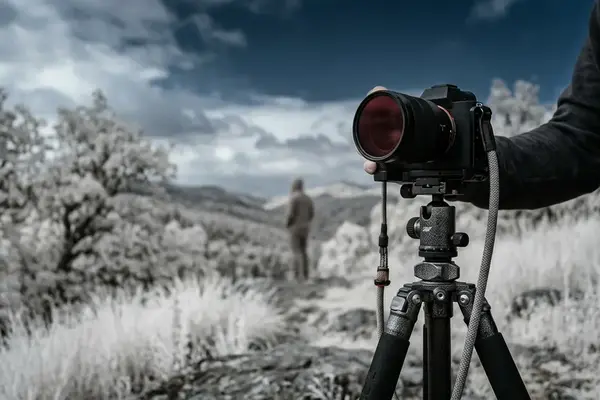
Robert Williams Wood published early infrared photographs in 1910, opening a photographic view beyond visible light. The dark, visible-blocking glass associated with his name belongs to that history, although it should not be treated as the identical filter behind every early exposure. Those photographs helped establish an enduring visual preference: bright vegetation against a dark sky.
Infrared sheet and roll film carried that preference into photographic practice. Photographers learned to prize pale foliage, luminous ground, and the separation infrared could give a distant landscape. As dedicated infrared film became harder to obtain, converted digital cameras made this visual language accessible without specialized film. A dedicated conversion replaces the camera’s internal infrared-blocking filter with an infrared-pass filter; a full-spectrum conversion usually leaves wavelength selection to a filter elsewhere in the optical path.
The portrait inherits a difficult expectation: make the subject glow.
On a face, near-infrared can compress complexion differences and soften local contrast. The brightness that gives a landscape its unfamiliar character can leave a sitter luminous but poorly defined. The Wood effect specifically names bright vegetation; skin’s pale appearance involves different absorption and scattering behavior. Keeping that distinction clear helps shift the portrait’s goal from maximum brightness to recognizable facial structure.
What Near-Infrared Does to Living Skin
Why does a face often become pale through an infrared-pass filter? Melanin absorbs less strongly as the recording band moves from visible light into near-infrared. Differences that strongly mark complexion in an ordinary photograph therefore become less pronounced, though they do not disappear uniformly across all skin tones.
Light also scatters within tissue before returning toward the camera. That subsurface contribution can soften fine surface contrast and give cheeks a faintly translucent appearance. Some superficial veins may remain darker against the brighter surrounding skin. The camera records reflected light shaped by absorption and scattering; it does not see through the face.
Choose The Facial Band
A nominal 590 nm long-pass filter admits visible orange-red light along with near-infrared, retaining more familiar facial cues. A nominal 850 nm long-pass filter excludes visible light much more decisively and can push the rendering toward a pale mask. These labels describe filter categories rather than perfectly abrupt transmission boundaries.
Pupils often remain dark, while iris appearance varies with wavelength and pigmentation. Lip borders can retain useful edges, particularly when directional light describes the mouth. These surviving landmarks deserve attention during capture. This is pictorial reflected near-infrared photography, with no thermal or diagnostic reading of the sitter.
Placing Light So Bone Structure Survives the Glow
At a window, I begin with the cheek shadow rather than the brightest patch of skin. I turn the face relative to the light, then inspect the nose shadow and the turn beneath the jaw in a test frame. That sequence gives each adjustment a visible purpose. The familiar portrait problem of balancing key and fill remains, but infrared makes excess fill especially costly.
First establish whether the source supplies usable near-infrared. Daylight and tungsten-family lamps contain substantial near-infrared radiation. Many white LED panels concentrate their output in visible wavelengths, so a visibly bright panel can still produce a weak infrared exposure. Treat that as a source limitation before increasing exposure settings and accepting a noisier file.
Flat frontal illumination adds brightness to skin that already records with reduced local contrast. An off-axis key gives the face planes.
- For loop lighting, preserve a small nose shadow that remains separate from the cheek shadow.
- For short lighting, illuminate the side of the face turned away from the camera and retain the broader shadowed plane.
- Use a black flag to reduce reflected fill, or choose a darker background that defines the cheek and jaw.
Open shade needs that separation too. Recheck the pattern when moving from direct sun to high overcast: direction, fill, and spectral mixture can change. A slightly harder key means a smaller apparent source relative to the sitter, not necessarily a stronger lamp. Keep heat-producing sources at a comfortable intensity and distance.
Cloth the Infrared Sensor Refuses to See as Black
A black collar can become the brightest surprise in an infrared portrait. Visible color gives an unreliable prediction of near-infrared reflectance: some black dyes allow cloth to record gray or bright. Dye formulation, fabric construction, and surface finish all contribute.
Dense cotton or wool provides a useful starting candidate, but fiber names cannot settle the choice. Compare the actual garment with the sitter’s skin under the portrait source and working filter. A matte fabric that records dark can preserve the head’s boundary even when its visible color seems unremarkable.
Test The Jaw Boundary
Place the collar or scarf beside the jaw during the test. An isolated swatch cannot show whether luminous skin will merge with the garment. White or pale cloth can create one continuous light area beneath the chin, removing the edge that would otherwise describe its shape.
Repeat the test after changing filters. A different recording band can change the garment’s relative brightness. Choose wardrobe for the separation it records beside the face, rather than for a visible color story the infrared file may never retain.
Keeping Eyes, Lips, and Jaw in the Infrared File
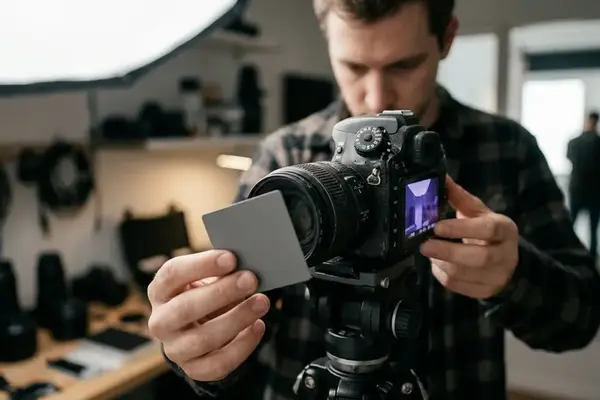
Begin with a custom white-balance reference under the portrait light and retain the raw capture. Use a neutral target known to behave suitably in near-infrared; a card that looks neutral to the eye may reflect this band unevenly. White balance supplies a useful rendering reference without converting infrared channel values into ordinary skin color.
For an initial finish, compare monochrome with restrained false color. A monochrome interpretation, whether developed directly or in Nik Silver Efex Pro, lets you judge facial edges without palette decisions competing for attention. False color can introduce a sense of warmth while preserving the same tonal structure.
A warm false-color cheek is a palette decision, not a recovered complexion.
Preserve The Facial Edges
- Lift blocked eye-socket shadows enough to reveal detail while retaining their depth.
- Inspect the lip line and crease beside the nose separately, preserving their relationship to adjacent skin.
- Trace the contour toward the jaw before increasing local contrast.
As the edit develops, keep adjustments confined to the feature that needs them. Global clarity or full-frame high-pass sharpening can turn softened skin into a chalky surface. Channel swaps redistribute recorded information; heavy false color can suggest a complexion the exposure never captured. If the raw cheek contains no readable plane, processing can darken an area but cannot recover a bone edge that the lighting never described.
Stop the Glow at the Cheekbone
Judge the sitting by tracing the boundary from brow through cheek to jaw, then inspect where chin, collar, and background meet. Prefer the frame with a readable contour over the one with the brightest skin. A slightly harder, off-axis key and a darker surrounding field give the glow a place to end.
If the face has become featureless, reshoot. Move the source or replace the merging garment first, then make a fresh test exposure so the effect of that change stays identifiable. Sharpening a pale mask only emphasizes the absence of structure.
Expose and light for facial separation first, and let the infrared glow stop at the lit cheek.








Reader Comments
The conversation starts with you.
Your Comment